3. Growing Paphiopedilum Seedlings: From Flask to Flowering
Exhibition and Maudie Types.
Exhibition and Maudie Types.
Growing Paphiopedilums or Paphs as they are commonly called, from a tiny seedling taken from inside a flask, then grown on to flowering, must be one of the easiest and most rewarding part of growing orchids, one could have.
My main interest is in the complex or more commonly called the “Exhibition Types”, as well as the Maudiae group and species.
My first Paphiopedilums were from a couple of plants in 50 mm tubes, bought many years ago. This was my most rewarding part of the hobby, learning how to grow from a tiny plant to maturity and then finally flowering it.
Over the years with knowledge gained from books and other experienced Paphiopedilums nursery growers, I refined my ideas to method as described below.
As a hobby grower, I found it a very easy and fast growing method.
It is relatively cheap and fairly easy to buy flasks of Paphiopedilums hybrids in either hobby size flasks, this usually is about 12 to 15 plants, or commercial size, usually about 20 to 25 plants.
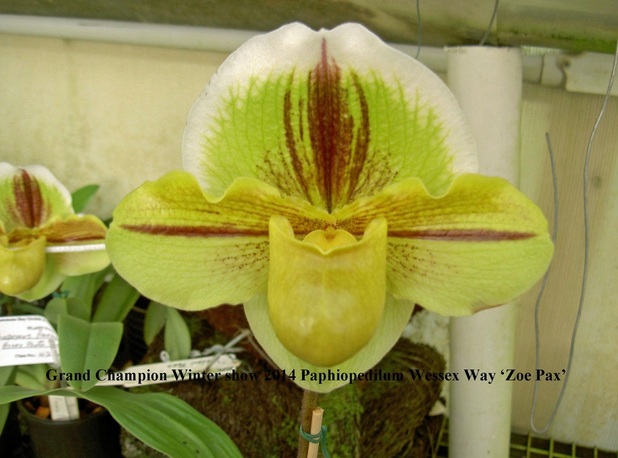
This would give you a chance to grow maybe something very good and allow you to win on the show bench, also a chance at the champion seedling class, Champion Paphiopedilum and Grand-Championship.
Deflasking.
Deflasking Paphiopedilums is a fairly easy! (Yes!).
First make sure all your pots, de-flasking area (sink etc.) are well sterilised with quality bleach.
Items needed are squat pots in either round 100 mm size or I find a lot easier to work with the 100 mm square types.
One thin stainless steel rod of about 300mm long by 5mm. (too break the glass with).
Packet of a good Fungicide, I always use Fungirid.
Small watering can with a “Rose Head”
Mini bark nuggets (treated) moist but not wet
Medium bark (treated) moist but not wet
(I also have great success lately using treat CoCo nuggets of 12 to 18mm size.)
Foam box (optional) and some glad wrap.
I now use an electrical heating bed with thermostat controls and comes with clear plastic vented domes. This makes life very easy as in winter I now can give extra warmth to the seedling.
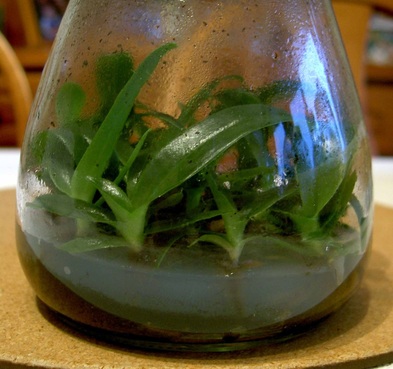
The flasks commonly come in straight wall polypropylene type flasks, glass jars or glass bottles, sometime glass beakers.
Now before doing all the below methods of getting the small plants out of the flasks, start by having a sink full of just body warm or tepid water. Not hot or nor cold. Straight town tap water with all its additives works just fine.
Then do all the below instructions on de-flasking below water to avoid risking bruising to the plants via impact shock. Never hit the flask with a hammer or similar object as the impact shock will badly bruise the tender young plants.
Most reputable nurseries use a good quality agar and usually about 15 to 20 mm thick. It stays like a firm soft jelly holding on to the bottom of the flask well and is soft enough to allow the plants roots to penetrate easily, but not collapse if flasks are tumbled in transit.
It also has a very good long life to allow to be held at home for a month or so if need be.
Polypropylene flasks: Then it is just a case of opening the lid and tipping the plants out.
Glass Jar types of flasks: I just use the stainless steel rod, insert it in an angle to the bottom corner, and give it a quick tap with a small piece of wood or similar object. This may need to be done several times and usually results in the jars bottom coming off fairly cleanly, allowing the seedling to fall out.
The young plants are sometimes difficult to separate as the paph. roots love to attach themselves to each other. I use a thin shis-kabab stick to ease the roots apart.
It they prove too difficult, you can put a couple together in the community pot.
They will be more easily separated after a year's growth. Separate them into groups of similar size, washing the entire agar off if possible.
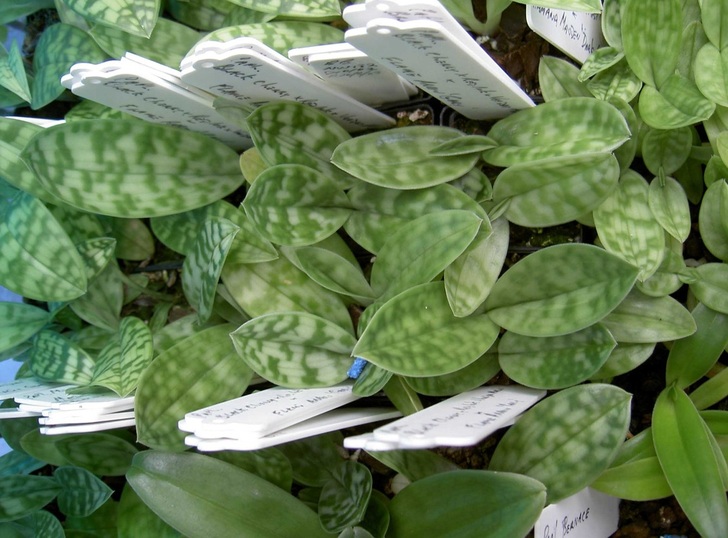
Now I fill a 100mm square pot three quarters full with medium size bark (15 mm). Cover with a thin layer (5 mm or so) of mini nuggets and holding at a slight angle away from your body. Fill the side with a thin layer of mini bark and stand your plants against that then back fill and stand another row of plants, back fill etc. (See Photo No1)
My main interest is in the complex or more commonly called the “Exhibition Types”, as well as the Maudiae group and species.
My first Paphiopedilums were from a couple of plants in 50 mm tubes, bought many years ago. This was my most rewarding part of the hobby, learning how to grow from a tiny plant to maturity and then finally flowering it.
Over the years with knowledge gained from books and other experienced Paphiopedilums nursery growers, I refined my ideas to method as described below.
As a hobby grower, I found it a very easy and fast growing method.
It is relatively cheap and fairly easy to buy flasks of Paphiopedilums hybrids in either hobby size flasks, this usually is about 12 to 15 plants, or commercial size, usually about 20 to 25 plants.
This would give you a chance to grow maybe something very good and allow you to win on the show bench, also a chance at the champion seedling class, Champion Paphiopedilum and Grand-Championship.
Deflasking.
Deflasking Paphiopedilums is a fairly easy! (Yes!).
First make sure all your pots, de-flasking area (sink etc.) are well sterilised with quality bleach.
Items needed are squat pots in either round 100 mm size or I find a lot easier to work with the 100 mm square types.
One thin stainless steel rod of about 300mm long by 5mm. (too break the glass with).
Packet of a good Fungicide, I always use Fungirid.
Small watering can with a “Rose Head”
Mini bark nuggets (treated) moist but not wet
Medium bark (treated) moist but not wet
(I also have great success lately using treat CoCo nuggets of 12 to 18mm size.)
Foam box (optional) and some glad wrap.
I now use an electrical heating bed with thermostat controls and comes with clear plastic vented domes. This makes life very easy as in winter I now can give extra warmth to the seedling.
The flasks commonly come in straight wall polypropylene type flasks, glass jars or glass bottles, sometime glass beakers.
Now before doing all the below methods of getting the small plants out of the flasks, start by having a sink full of just body warm or tepid water. Not hot or nor cold. Straight town tap water with all its additives works just fine.
Then do all the below instructions on de-flasking below water to avoid risking bruising to the plants via impact shock. Never hit the flask with a hammer or similar object as the impact shock will badly bruise the tender young plants.
Most reputable nurseries use a good quality agar and usually about 15 to 20 mm thick. It stays like a firm soft jelly holding on to the bottom of the flask well and is soft enough to allow the plants roots to penetrate easily, but not collapse if flasks are tumbled in transit.
It also has a very good long life to allow to be held at home for a month or so if need be.
Polypropylene flasks: Then it is just a case of opening the lid and tipping the plants out.
Glass Jar types of flasks: I just use the stainless steel rod, insert it in an angle to the bottom corner, and give it a quick tap with a small piece of wood or similar object. This may need to be done several times and usually results in the jars bottom coming off fairly cleanly, allowing the seedling to fall out.
The young plants are sometimes difficult to separate as the paph. roots love to attach themselves to each other. I use a thin shis-kabab stick to ease the roots apart.
It they prove too difficult, you can put a couple together in the community pot.
They will be more easily separated after a year's growth. Separate them into groups of similar size, washing the entire agar off if possible.
Now I fill a 100mm square pot three quarters full with medium size bark (15 mm). Cover with a thin layer (5 mm or so) of mini nuggets and holding at a slight angle away from your body. Fill the side with a thin layer of mini bark and stand your plants against that then back fill and stand another row of plants, back fill etc. (See Photo No1)

(Reason I use the bigger bark in the base is to allow better aeration and allow the younger roots to meander and grow deeper into the pot searching for food and water.)
Depending on the size of the plants, I usually put four to five plants in each row and make about four rows.
There is no need to jam-pack them or to put them in too thinly, just as many as you can fit comfortably.
Paphiopedilums are one type of orchid that seems to love the close company of each other!
Making sure all the roots are just covered, and then give the pot several gently taps on the side to settle in the plants and bark, top off again with mini bark if necessary.
Place name tag into each pot.
When each flask is done I use this water in the sink to flush through the pot with a small watering can with a Rose Head (sprinkler).
This I believe puts some of the sugars and fungi from the agar around the plants roots and helps kick start their growth. Use a new lot of fresh water for each flask done. This also avoids contamination of all the plants if one flask is contaminated in any way.
When all the plants have been deflasked and placed in the their pots, I use fresh tepid tap water and a good fungicide mixed according to directions in the freshly bleached and cleaned water can with Rose Head attached.
Make sure at this stage to wear correct safety gear of gloves and mask.
I just water each pot to run off stage with the fungicide mix.
Then all pots are place into the foam box and lightly sealed off with the glad wrap.
Place in a position in the greenhouse with some warmth and out of direct sunlight.
Leave for several days to harden off and settle in and adjust to their new environment.
Then pull a small amount of glad wrap away from two corners to let in the fresh air.
Let stand for another couple days and the remove about one quarter and leave for a further few days to harden off. By then they can be taken into the orchid house and placed in a warm shady position.
If your orchid house is of high humidly and this is done in early spring or very early autumn, above method can usually be done away with.
But for hard to get or valuable plants, I still use the above method in the foam box or heat bed.
For the next month or so I like to water ever four to five days with fresh rain water or if not available, tap water. I like to mist them regularly on warm or hot days, never allowing the bark in the bottom half of the pot to completely become bone dry.
After a month or so of the plants being allowed to settle in, I then start my fertiliser programme. For the next twelve months or so I like to use only organic fertiliser about one third or quarter strength. (I use products like “Garden Party” a Blood & Bone product in liquid concentrate, “Acadian” a seaweed extract, Charlie Carp, etc. (Avoid any that has urea or chemical fertilisers added in any way)
Breaking up the Community pot.
Now the Fun Part! After a full growing season of 12 months or so the plants should have doubled or tripled their size.
In early spring around early October onwards, I like to re-pot the community pots.
I like to repot the Paphs just before new root growth starts and thus avoid any damage to the brittle new root tips.
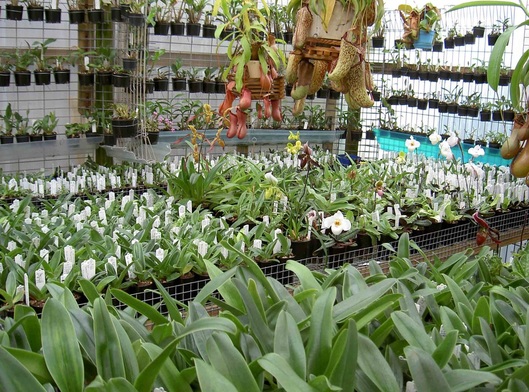
I now use 48 mm square tube style pots as the fit into my tray system easily, and Paphiopedilums love a deeper style of pot. (See Photo No2)
Now the Fun Part! After a full growing season of 12 months or so the plants should have doubled or tripled their size.
In early spring around early October onwards, I like to re-pot the community pots.
I like to repot the Paphs just before new root growth starts and thus avoid any damage to the brittle new root tips.
I now use 48 mm square tube style pots as the fit into my tray system easily, and Paphiopedilums love a deeper style of pot. (See Photo No2)
I now use treated small bark (10 mm), From now on all pot sizes are governed by root size, not the leaf size. I like to place two seedlings side by side into each 48 mm sq. pot. Using just a small amount of bark to separate them.
If the plant has done exceptional well and its root system is big enough, I place them one per pot. Making sure the plants roots are covered and the crown of the plant exposed.
If not planted deep enough the plant will wobble and become unstable and grow poorly.
After each plant is potted, I like to sprinkle a few grains of Sel-Grit (small pebbles of crushed limestone) and canunda shells (supplies lime to the plants) onto the top of each pot and then tap the side of the pot to settle all in.
After all potting is finished, I place the pots into a tray and give a good flush with water to which I again added an organic fertiliser at about half strength.
This again helps build up the associated fungi etc. that helps the roots accept the fertiliser.
Place the tray back into the orchid house, fertilising every second watering with an organic fertiliser at half strength for a month or so before using a regular Paphiopedilum fertiliser again at half strength.
I then like to alternate the organic with the chemical fertiliser every second watering.
The plants will remain in these tubes until the following October, then I do the next phase of their growth cycle.
Repotting the 2 year old seedling
By now two full growing seasons will have passed, if all have grown well the plants should have trebled their size.
Early October again, by this time most of the Paph seedlings will be of such good leaf and root growth as to allow them to be potted into the bigger pots.
I now pot all the bigger plants with good root growth into 80 mm tube style pots, these deeper style pots, I find allow the roots to grow longer & stronger than the squat style pots. In the squat style pots the roots seem to just hit the bottom of the pot and go around in a circle or just stop growing, resulting in a poorly grown plant.
In the 80 mm pots I now use medium size treated bark (15 mm), as I take each plant out of the 48 sq. tubes I check on root size. Most of the plants should have several roots, nice and thick about 70 to 80 mm long.
If the growth has been poor they go back into the 48 sq tubes, either one or two per pot depending on their root size.
For the others of good root growth, I usually plant two per 80 mm pot, separated by a bit of the potting mix. They seem to like this method rather that being singly planted at this smaller size of growth.
After settling in the plants and bark mix, I top of with about 6 to 8 pellets of “Organic Life” fertiliser. This is a mix of Blood & Bone, chook manure, seaweed, fish meal etc and pelletised for ease of use.
Cover this with a thin layer of bark, then I top of each pot again with about ¾ of a teaspoon of Sel-Grit and canunda shells pre mixed together.
Give the plants a good flush with fresh water and place back on your benches; I water when the pot is nearly dry, about 3 to 4 days apart in warmer weather and maybe every 2nd or 3rd day in hot weather.
One trick I now use is to lift up a couple pots randomly and look at the potting mix at the bottom through the drainage holes. If it is real wet looking, I do not water and check a few days later.
What I am looking for is bark nearly dry but suggesting it has only a bit of moisture left.
Then I water, no good looking at the mix at the top of the pot as the growing of the roots are nearer the bottom of the pot, again it works for me.
The Organic Life pellets should last about six weeks and after that I go back to my regular commercial chemical Paphiopedilum fertiliser used at nearly full strength ever second watering.
Repotting the 3 year old seedling!
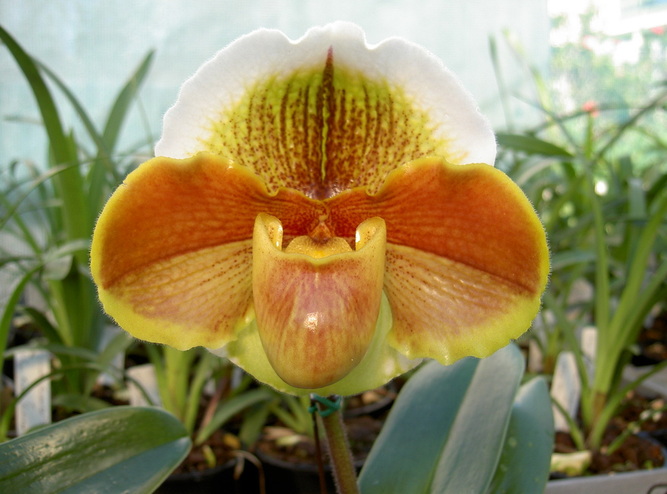
October rolls around again, repotting time! Now most of the Paphs should be of very good size. Plants are heading into their fourth year of growth and by the end of this growing season (autumn) a fair few will flower for the first time.
At this stage of growth, each plant should be capable of going into a single 80 mm tube with the poorer growers going back to two plants per pot.
This year all the better grown plants are put back into the 80 mm pots as per last year with Organic Life fertiliser and the ¾ of a teaspoon of Sel-Grit and canunda shells pre mixed together spread on the top of the bark.
Water and repeat last year’s fertiliser programme.
Repotting the mature plants.
Early October every year I like to repot all my Paphiopedilum plants, they seem to love being regularly repotted and show it in the new vigour in there growth after being repotting.
Once the Paphiopedilums have flower I repot every year except maybe of the large clumping plants in say a 150 mm pot, these I do every second year without any problems.
For the plants in the 80 mm pots if they have several new lead growths, I like to go up into the 100 mm grow tube type of pot with very good drainage holes.
The rest, if the roots will fit, I still use the 80 mm pots. These and all my Paphs in 80 mm pots or larger I still use the 15 mm treated bark.
These are repotted and treated like the 3 year old seedling as described above.
For the larger 170 mm or 200 mm pots I like to add about 50% of 20mm treated bark to the 15 mm treated bark as this gives a more open mix in the larger pots.
Temperature
In our area we have a range of temperature in the orchid house from winter low of 5 deg. C to nearly 40 Deg C in summer. No heating system is use in the winter.
I run two oscillating fans 24/7 and have the concrete walkway constantly wet also to help keep up the humidity.
I have built water wells under each bench constantly filled with water.
I regularly water the walk ways down also if I am home in hot weather.
A misting system could also do this if you were away from home a lot.
Water Quality
Most town's tap water is treated with chemicals to prolong the water's life and also raise the Ph level to often around ‘8,’ very Alkaline. This is so the old copper water pipes are not corroded by acidic water.
While most orchids seem not to mind the quality of the water, Paphs do, I always leave my tap water rest in 20 litre plastic buckets to allow the gasses etc to escape from the water, to my mind it works for me.
Rain water
I have always had a reasonable access to small amounts of rain water for my plants, even if stored in a couple of plastic type 100 litre drums.
Now I have connected small and 9.00 litre rainwater tanks to my orchid house roof and use this as much as possible on my Paphiopedilums.
To my way of thinking the response back form the plants has been 200% better growth, especially the younger plants.
I hope in some way I have been able to assist you in learning how easy it is to grow deflask Paphiopedilums and grow them to maturity, maybe eventually a Champion on the show bench.
Good Growing
Ron Boyd
